Managed Identity – Part III
By rickvdbosch
- 4 minutes read - 820 wordsThis post is part of a series on Managed Identity. For an introduction, see Managed Identity – Part I. For a post that shows you how to connect your application to different types of Azure resources using Managed Identity see Managed Identity – Part II. Stay tuned for future posts.
Introduction
Elaborating on Part I and Part II, this blog post will show you how to debug your Managed Identity enabled application locally.
Normally debugging something when running it locally shouldn’t deserve its own blog post. With Managed Identity there are some things to take into account when debugging since it heavily depends on the Azure platform. So here we are 😊
Azure Service Authentication
The first thing you need to do is configure the account to use when debugging applications from Visual Studio by checking if the correct account is selected. To do this go to Tools – Options – “Azure Service Authentication” and choose/configure the right account.
Choose an account for your apps to authenticate and access Azure resources with when debugging from Visual Studio.
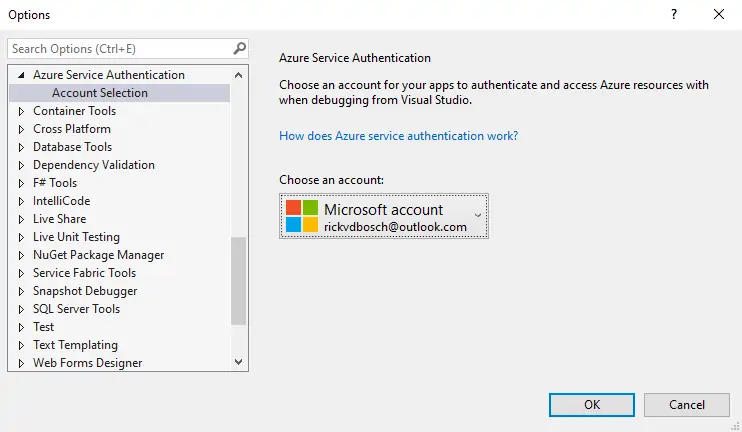
Azure Service Authentication - Account selection
When you’re running applications locally without debugging from Visual Studio, for instance by manually executing func start or running your console app, you need to do some extra magic…
Device login
For those of you who have the Azure extension in Visual Studio Code; you’re probably familiar with the Device Login. The same process goes for logging in into command line environments. You can sign in interactively through your browser with the az login command. This used to tell you to go to https://microsoft.com/devicelogin and enter a random code as shown here:
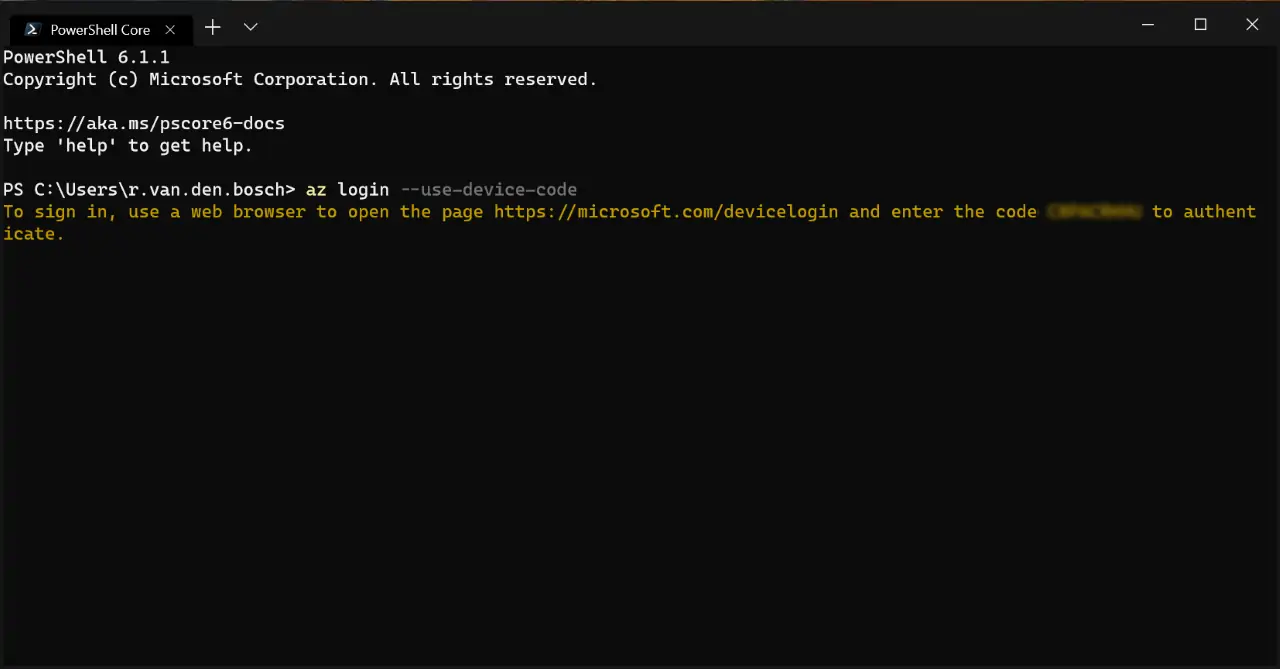
az login –use-device-code
With the most recent versions of the Azure CLI, this is even simpler. You execute az login, a browser is opened where you login to your account and you’re done. This looks like the image below. As you can see, this command automatically finds all subscriptions to which you have access right after you logged in.
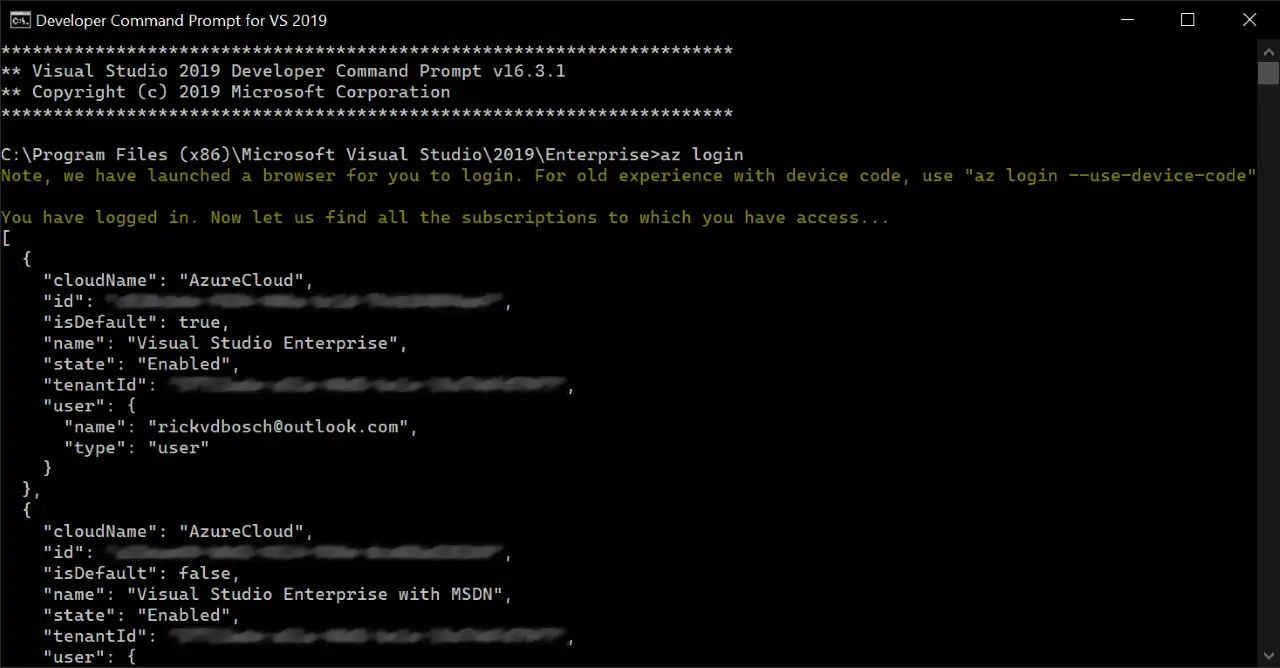
az login
Connecting to resources
Connecting to Key Vault simply works. The AzureServiceTokenProvider has a KeyVaultTokenCallback we can pass into the constructor of the KeyVaultClient using a KeyVaultClient.AuthenticationCallback and the result is our locally running application being authenticated to connect to the Key Vault (depending on the rights we gave ourselves, of course).
Connecting to other Azure resources while running locally, like Azure SQL for instance, is a bit more challenging. Let’s start by taking the steps necessary:
- Create a SQL Server and SQL Database
- Add your user account to an AD group and set it as the AD admin *
- Try to connect to the database using the code from Managed Identity – Part II
- Currently, Microsoft accounts (like live.com, outlook.com) cannot be set as admin. Only users and security groups within your organization can be set as admin.
private const string RESOURCE = "https://database.windows.net/";
private const string CONNECTIONSTRING = "Server=tcp:<YOUR_SERVER_NAME>.database.windows.net,1433;Initial Catalog=<YOUR_DATABASE_NAME>;";

using (var connection = new SqlConnection(CONNECTIONSTRING))
{
    var tokenProvider = new AzureServiceTokenProvider();
    connection.AccessToken = await tokenProvider.GetAccessTokenAsync(RESOURCE);
    await connection.OpenAsync();
    // Do your magic to the database!
}
And here is the result:
SqlException - "Login failed for user 'NT AUTHORITY\\ANONYMOUS LOGON'."
Why don’t I have access?

Wait… what? Looking into the details, we’ll find that the call to GetAccessTokenAsync went through fine and even provided us with a token. Then why is that not working? And what’s up with that ‘anonymous logon’?
Even more puzzling is the fact that, when deploying this to Azure, it actually works.
Deconstructing the token we got using a tool like jwt.ms or jwt.io shows that the audience for the token is exactly what we expected it to be: https://database.windows.net. The issuer however seems to be off. It’s not the same as our Azure Active Directory tenant.
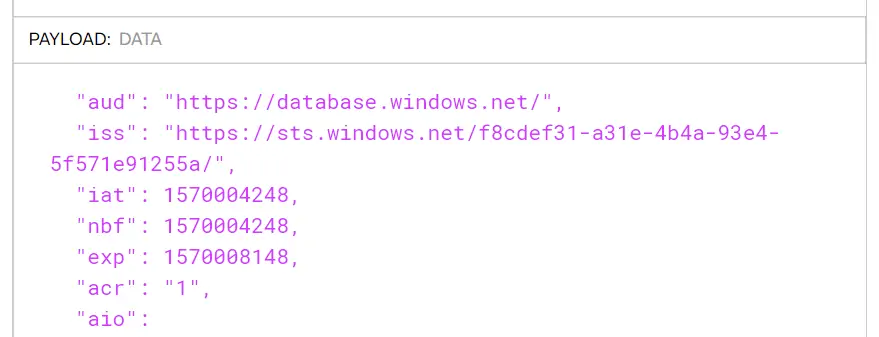
Not the right issuer 😕
Apparently, when using an Microsoft account (mine’s an Outlook.com one, migrated over from the good old Hotmail days) you need to explicitly specify the tenant id you want to use. This can either be the Directory ID of your Azure Active Directory that you can find on the Azure Active Directory properties blade, or the xxx.onmicrosoft.com name associated with it. The call to GetAccessTokenAsync then changes into this:
private const string TENANT_ID = "<YOUR_TENANT_ID>";

connection.AccessToken = await tokenProvider.GetAccessTokenAsync(RESOURCE, TENANT_ID);
After this change, we can see the token we’re getting is actually from my Azure Active Directory tenant.
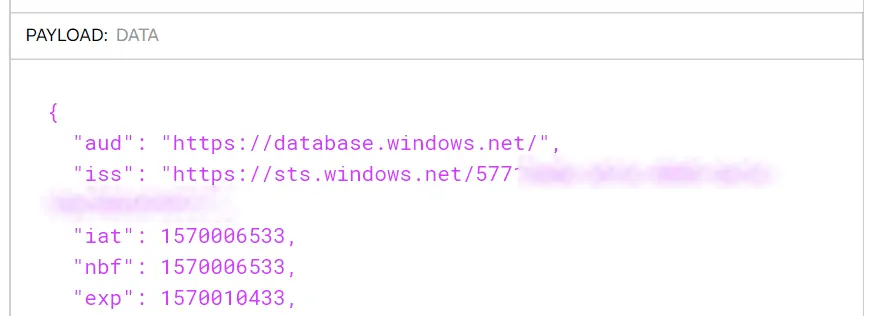
The right issuer! 🤓
Conclusion
Running applications locally but still leveraging the power of Managed Identity is very well possible. Although there are a few caveats. So whenever you’re running into your local user not being able to connect to an Azure Resource using Managed Identity: check if you specified the Tenant ID!
Hope this helps.
Resources
The GitHub repo rickvdbosch/managed-identity-example holds an example implementation of connecting to quite a few types of Azure resources. It will be updated regularly.
If you have any questions, don’t hesitate to contact me.