Managed Identity – Part I
By rickvdbosch
- 4 minutes read - 788 wordsThis post is part of a series on Managed Identity. Stay tuned for future posts.
Introduction
Connecting your application to a resource like Storage or a SQL database used to involve a connection string. This isn’t very secure. These settings are available through the Azure portal. So they might get compromised.
With the introduction of Azure Key Vault, we got a way of separating these secrets from our application configuration. We can store them in a safe, secure place. There’s only one downside: you need a connection string to connect to Key Vault. So the problem isn’t solved; we only moved it. We can still get to the connection string the application uses to get secrets from Key Vault. So anyone with access to that connection string can still access those same secrets.
With Managed Identity (MI), we now have a truly secure solution. This series of blog posts will dive into MI and how to use it to separate secrets from code and configuration.
The basics
Managed identities for Azure resources provides Azure services with an automatically managed identity in Azure Active Directory (Azure AD). You can use this identity to authenticate to any service that supports Azure AD authentication without having any credentials in your code.
Azure AD managed identities for Azure resources documentation
Creating a Managed Identity
To use a MI for your application, you need to create one. There are two types: a System Assigned one and a User Assigned one. A system assigned MI is directly tied to the Azure service instance it’s enabled on. A user assigned MI can be assigned to one or more Azure service instances.
For our examples, we’re using a System Assigned Managed Identity.
These Azure services currently support using system assigned managed identities to connect to Azure resources:
-
Virtual Machines
-
Virtual Machines Scale Sets
-
App Service
-
Blueprints *
-
Functions
-
Logic Apps *
-
Data Factory V2
-
API Management
-
Container Instances *
-
Container Registry Tasks
* in preview
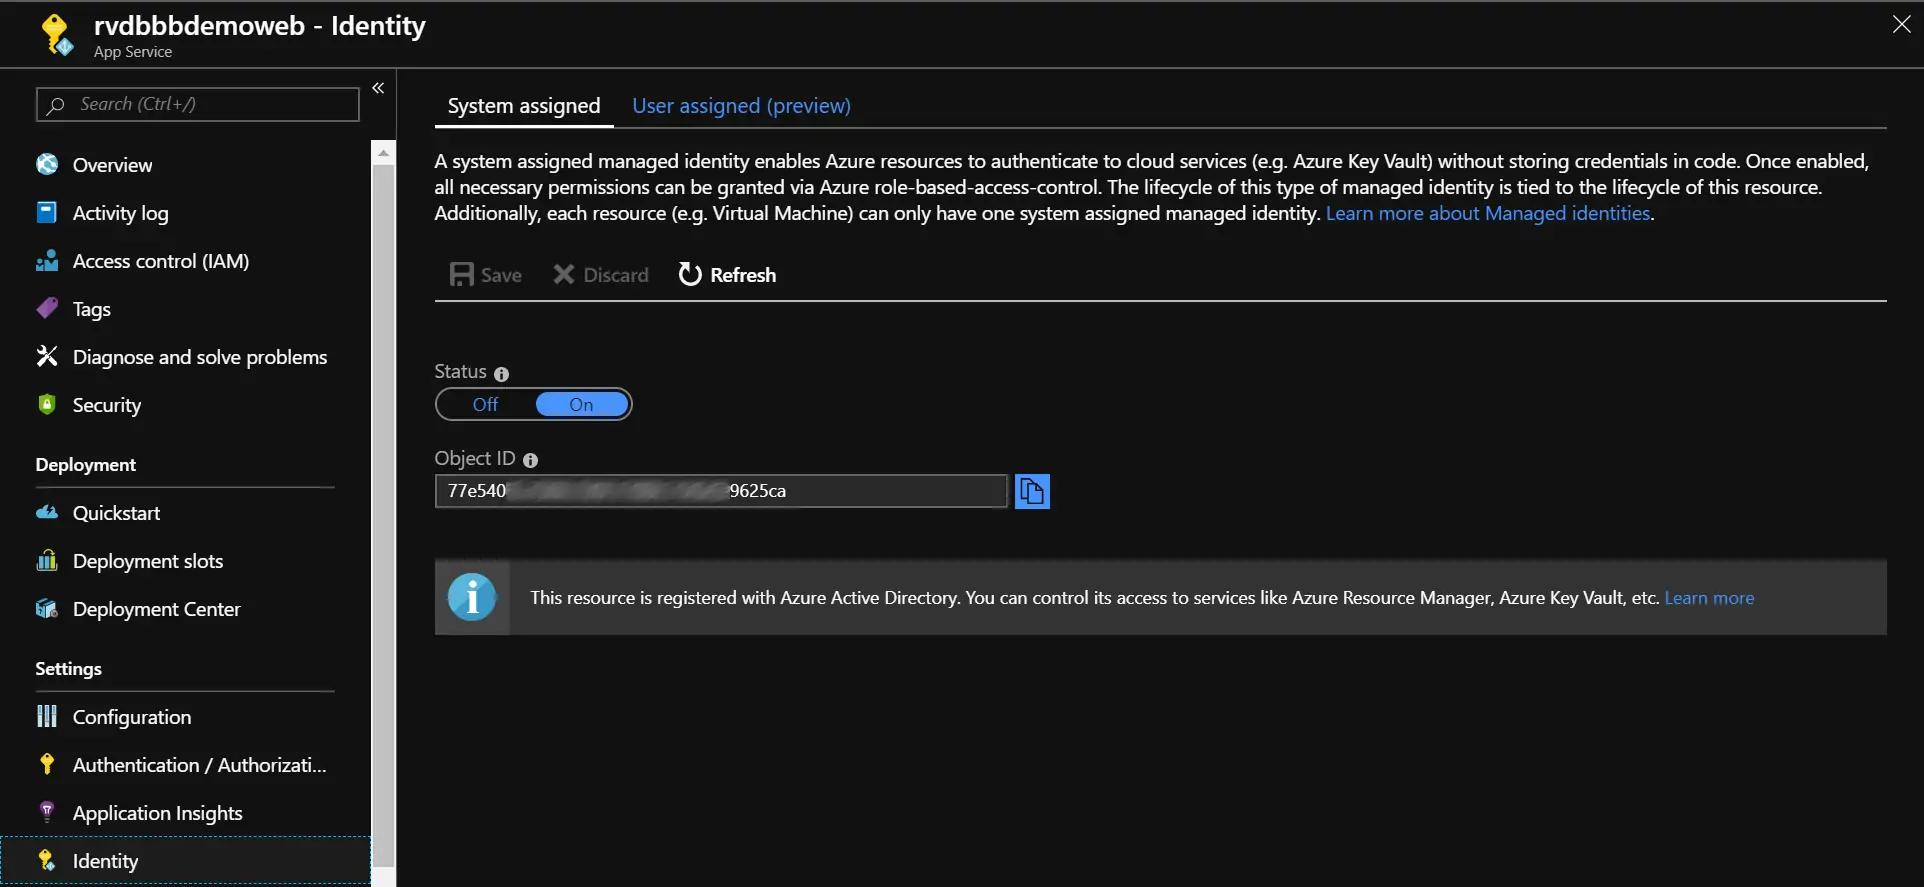
To create a MI, you go to the application you want to enable MI on in the Azure Portal. Select the Identity menu item to open the Identity blade:

The ‘Identity’ blade
By switching the Status toggle to On, you enable the MI for your application. Of course, don’t forget to click Save.
OK, so your application now has its own MI. What’s next?
Giving the Managed Identity access
Next up is giving the MI access to the resource you would like it to connect to. The list of Azure services that support using managed identities for Azure resources is as follows:
-
Resource Manager
-
Key Vault
-
Data Lake
-
Azure SQL
-
Event Hubs *
-
Service Bus *
-
Storage blobs and queues
-
Analysis Service
* in preview
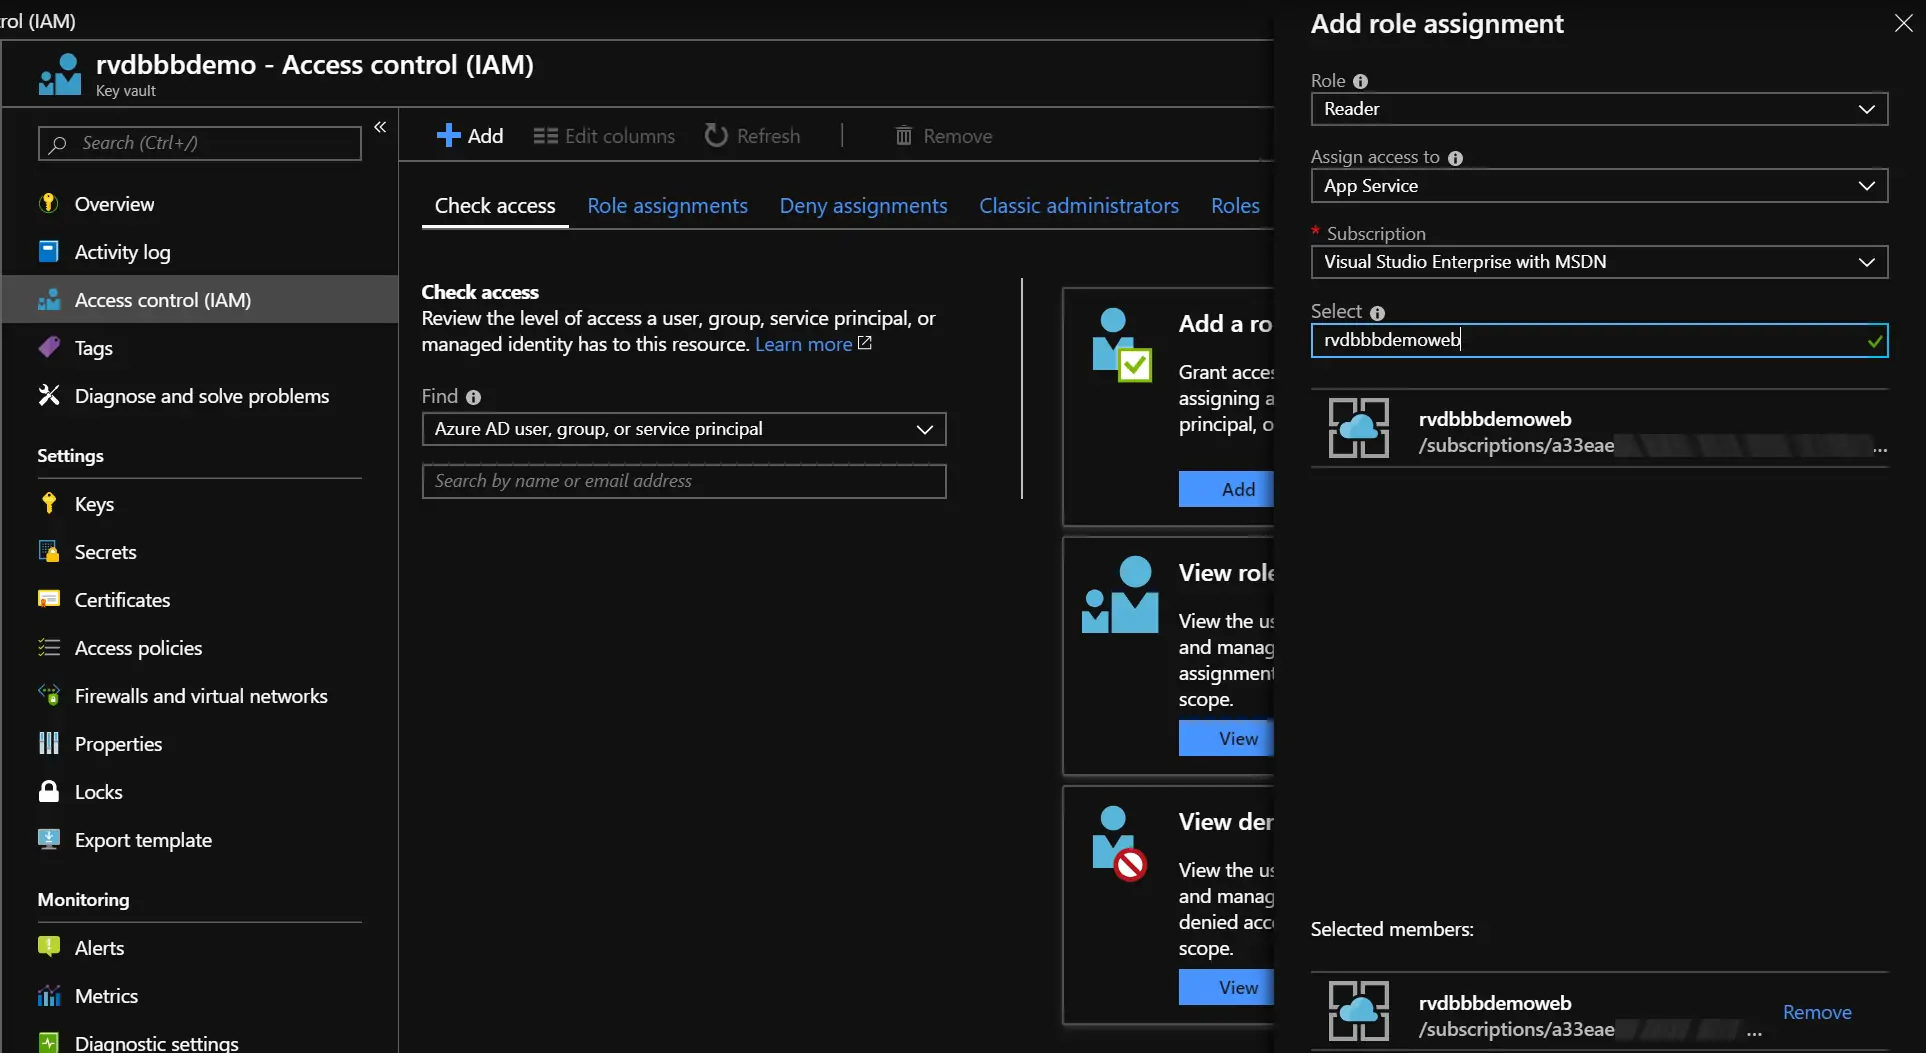
To give the MI access, go to the resource you want to connect to in the Azure Portal. Navigate to the Access Control (IAM) blade. There you can check the role assignment your MI has for the resource. Since we just created it, it shouldn’t have any. To give the MI access, add a role assignment to it:

The ‘Access control (IAM)’ blade
After selecting the identity and clicking save, the role will be added to the MI of the App Service. In this case rvdbbbdemoweb gets the role Reader assigned. This means the MI of the web application now has read access to the Key Vault.
Using the Managed Identity
To use the MI to actually read secrets from the Key Vault, add a NuGet package to your application: Microsoft.Azure.Services.AppAuthentication.
This NuGet package…
Enables a service to authenticate to Azure services using the developer’s Azure Active Directory/ Microsoft account during development, and authenticate as itself (using OAuth 2.0 Client Credentials flow) when deployed to Azure.
From there, it’s just a couple of lines of code to access the secrets in the Key Vault without any secrets in code or config.
// Name of the secret to get from Key Vault
private const string SECRET_NAME = "NAME_OF_THE_SECRET";

// The URL to the Key Vault to get the secret from
private const string VAULT_URL = "https://rvdbbbdemo.vault.azure.net/";

[...]

var tokenProvider = new AzureServiceTokenProvider();
using (var kvc = new KeyVaultClient(
    new KeyVaultClient.AuthenticationCallback(
        tokenProvider.KeyVaultTokenCallback)))
{
    var x = await kvc.GetSecretAsync(VAULT_URL, SECRET_NAME);
    var secret = x.Value;
}
As you can see, the only thing you’re specifying is the Key Vault to connect to and the name of the secret to retrieve.
In the next post in this series, I will be diving deeper into testing this code locally. Since you don’t have the MI available there, how can you debug your code?
Resources
You can find some working examples on GitHub: rickvdbosch/managed-identity-example. This repo will be updated regularly with new examples.
If you have any questions, don’t hesitate to contact me.