Getting started with the teXXmo® IoT Button
By rickvdbosch
- 3 minutes read - 540 wordsA few weeks ago I ordered some teXXmo® IoT Buttons to play around with. I wanted to jump right in, but I had to look some stuff up to be able to get it up and running, connecting to the right WiFi and IoT Hub. Here’s a short recap of how to get started with the teXXmo® IoT Button.
Starting the device
There are several modes the button can work in: sending its payload, configuring the button and running webREPL. For initial setup for an out of the box button, press and hold the button for 6 to 9 seconds. This puts the button in Configuration mode. It flashes orange with a frequency of 1 Hz (once per second), then red with the same frequency. For more information on the different modes the IoT Button can operate in, have a look at the flow chart.
Connecting to the device
Connecting to the device is pretty simple. If you want to configure it right away, visit the Azure Portal first to retrieve your IoT Hub connection string and device secret. You’re going to need it, and you won’t be able to get it once you’re connected to the button.

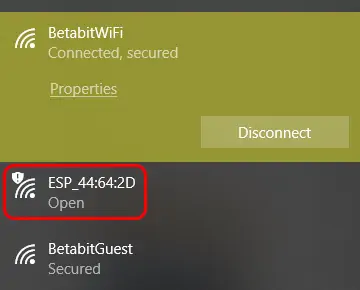
To connect to the button, you have to connect to its WiFi hotspot. The SSID is ESP_XX:XX:XX, where the XX:XX:XX is a code. For this IoT button, the SSID is ESP_44:64:2D.
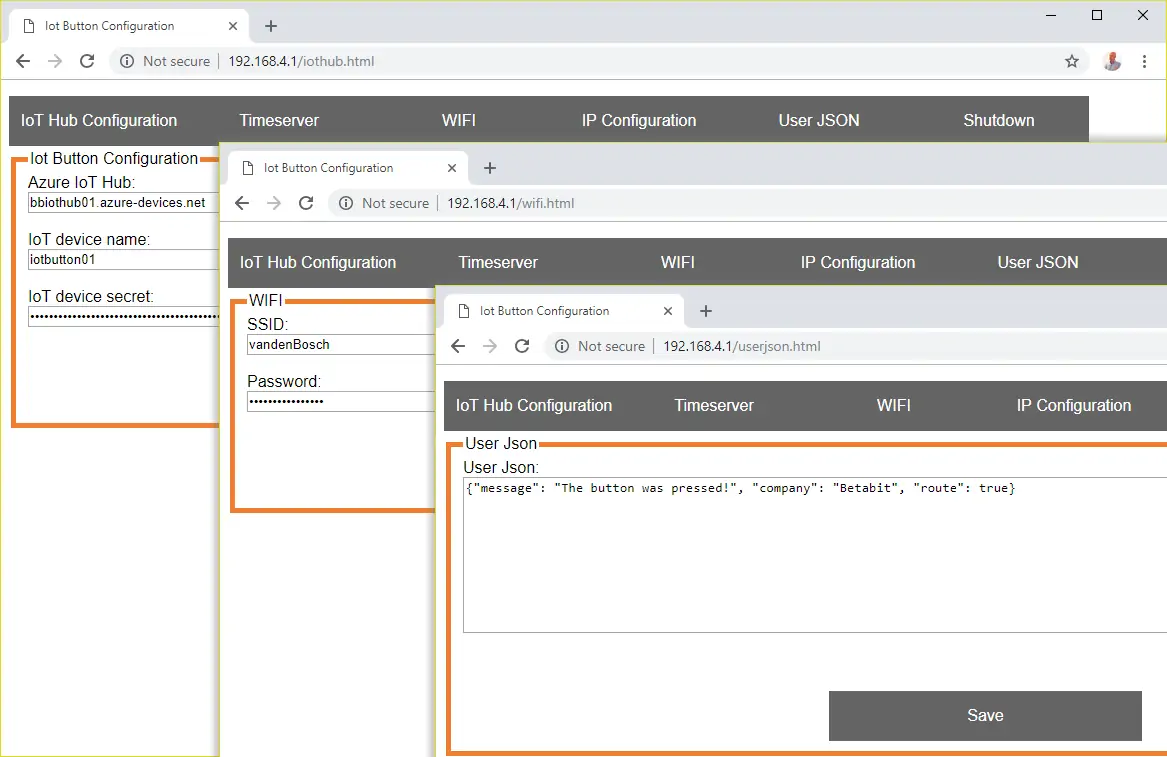
Once you’re connected to the device’s WiFi, open up a browser and go to 192.168.4.1. We’re now ready to configure the device.
Configuring the device
There’s several things you can configure on the device. Those being:
- IoT Hub configuration
- Timeserver
- WiFi
- IP Configuration
- User JSON

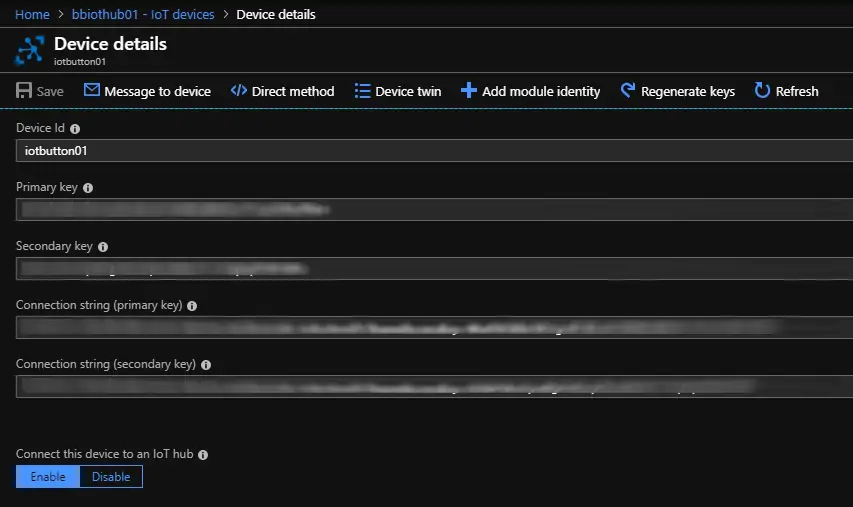
The IoT Hub configuration has three things you can set: the name of the Azure IoT Hub the IoT Button needs to connect to, the name of the device in the IoT Hub and the device secret. After you’ve created an IoT Hub, you can add the button to the hub as a device:

The WiFi settings are pretty self-explanatory: the SSID is the
service set identifier for the network. Or, in short: its name. The password is of course the password for the WiFi network, if any.
And, for this article, the last but definitely not least configuration tab: the User JSON. This field can hold any JSON you’ld like the button to send to the IoT Hub. As you can see in the image above, this is the payload I configured for this IoT Button:
{
    "message": "The button was pressed!"
    "company": "Betabit",
    "route": true
}
The reason I added the route property is I can use it to determine if I need to route this message based on Message routing.
Wrapping up
After you’ve configured everything you need to on the IoT Button, go to the Shutdown tab and shut down the button. To use it, just press the button for 1 to 5 seconds. The button will flash once per second while it starts, 10 times per second while it connects to the configured WiFi and IoT Hub to send the message. If all goes well, you’ll see the LED on the IoT Button light up green for 2 seconds, and your user defined JSON should be on the IoT Hub 🤓